Unity Tilemaps Educator's Guide
Introduction
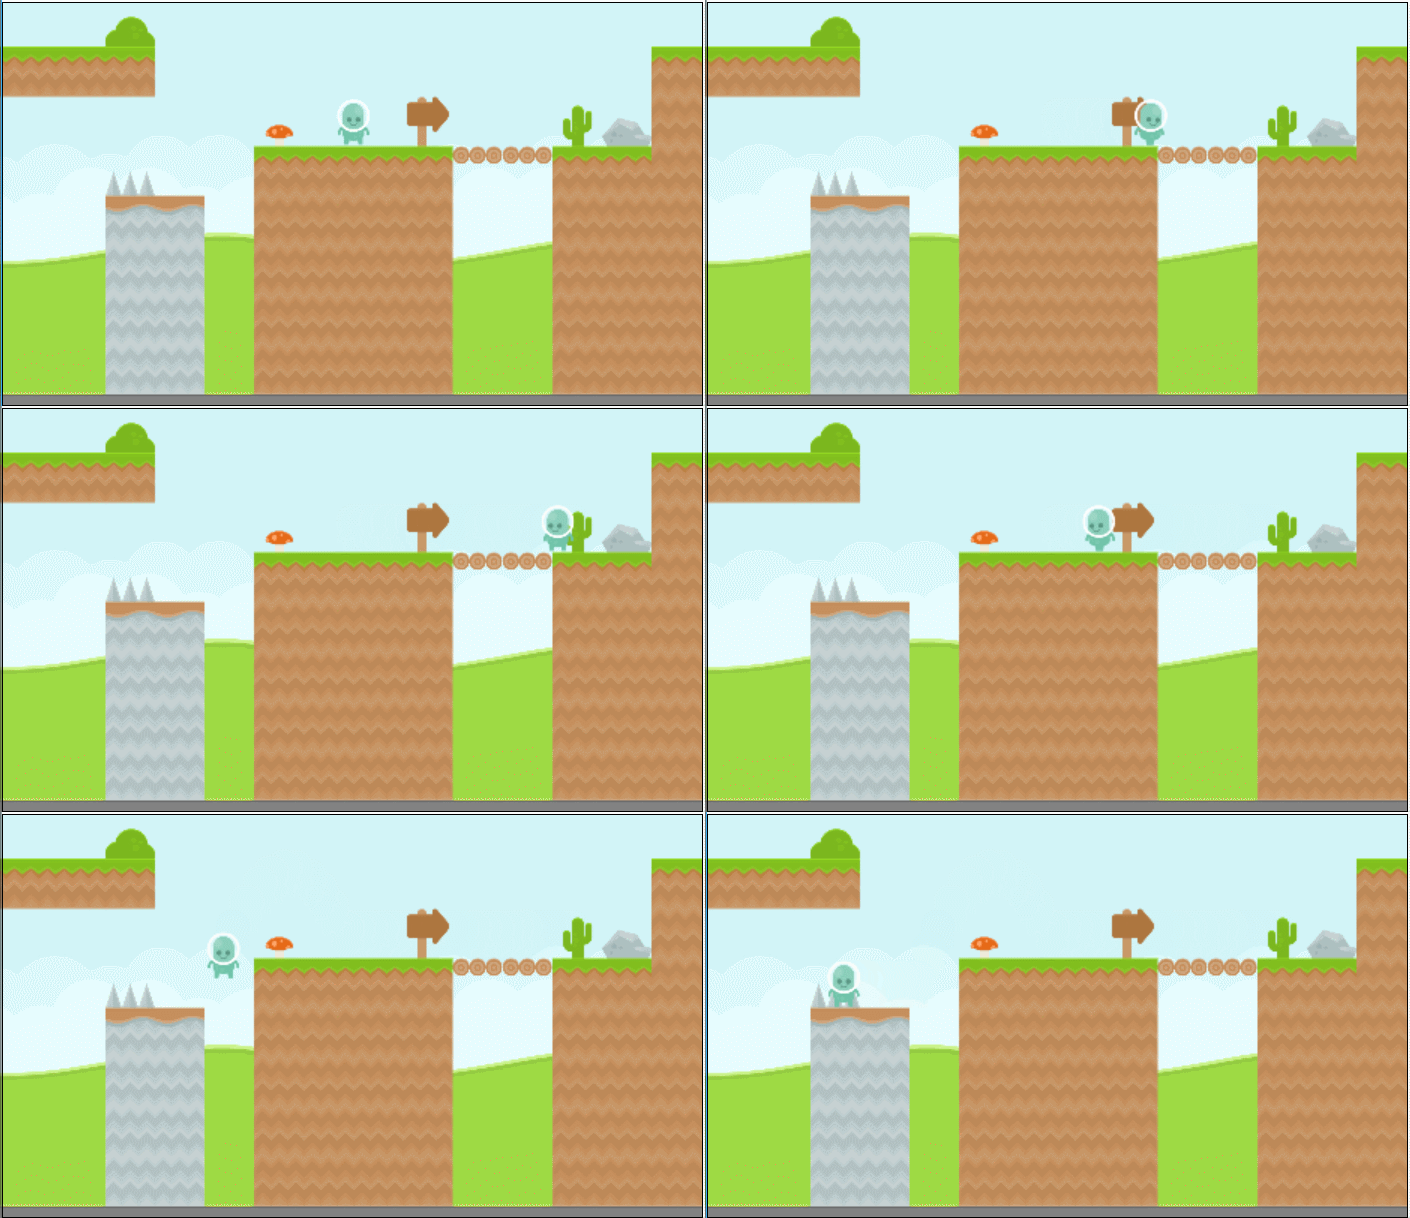
Content creation is an essential component of game development, and as game design educators, we want to equip our students with tools and techniques to streamline this process. One effective approach is to teach them how to create tile-based games.
In a tile-based game, the playfield is made up of small rectangular, square, or hexagonal pieces known as tiles. These tiles are given a unique ID or number that determines how they should be drawn and how they interact with player actions. By reusing tiles, game designers can create larger game worlds using fewer assets, which can save time and resources during development.
Many classic game titles such as the original Pokémon, Super Mario Bros., Legend of Zelda, and Diablo games used tiles, and even many current and large AAA games now use tile or grid-based systems to create open worlds. If you think about any game that uses regularly repeating squares of background, you’ll probably find it uses tilemaps. By understanding how to create and use tilemaps, students will be equipped with a valuable skill set that is widely applicable in the game development industry.
By following this tutorial, your students can learn how to create levels quickly using minimal art assets, making it a great tool to add to their collection as they continue their game development journey.
Technical Requirements
While I am using Unity 2022.2.1f1 this tutorial should work with minimal changes in future versions of the editor. If you would like to download the exact version used in this tutorial, and there is a new version out, you can visit Unity’s download archive at https://unity3d.com/get-unity/download/archive.
Please note that this is a beginner-level tutorial, but you should be familiar with Unity’s interface. If you are new to Unity or need a refresher on the basic concepts, check out Unity’s built-in documentation on the subject at: https://docs.unity3d.com/Manual/UnityOverview.html.
The code used at the start of the project can be found on my website at http://johnpdoran.com/UnityProjects/Tilemap-Starter.zip
Project Setup
Now, before we can start creating the tilemap itself, we need to have a base project in place for us to be able to interact with the environment and see some of the potential pitfalls that could occur when we try to integrate tile maps into our project. Instead of creating the project completely from scratch, I have designed a quick platformer character and level that we can use as a basis for this project.
- First, download the starter project code listed above and open the project in Unity.
The art assets used for this tutorial were created by the incredibly talented Kenney. You can find more information about him as well as his art assets at: http://kenney.nl/
- Once the project is loaded, hit the play button to verify the project is running correctly.
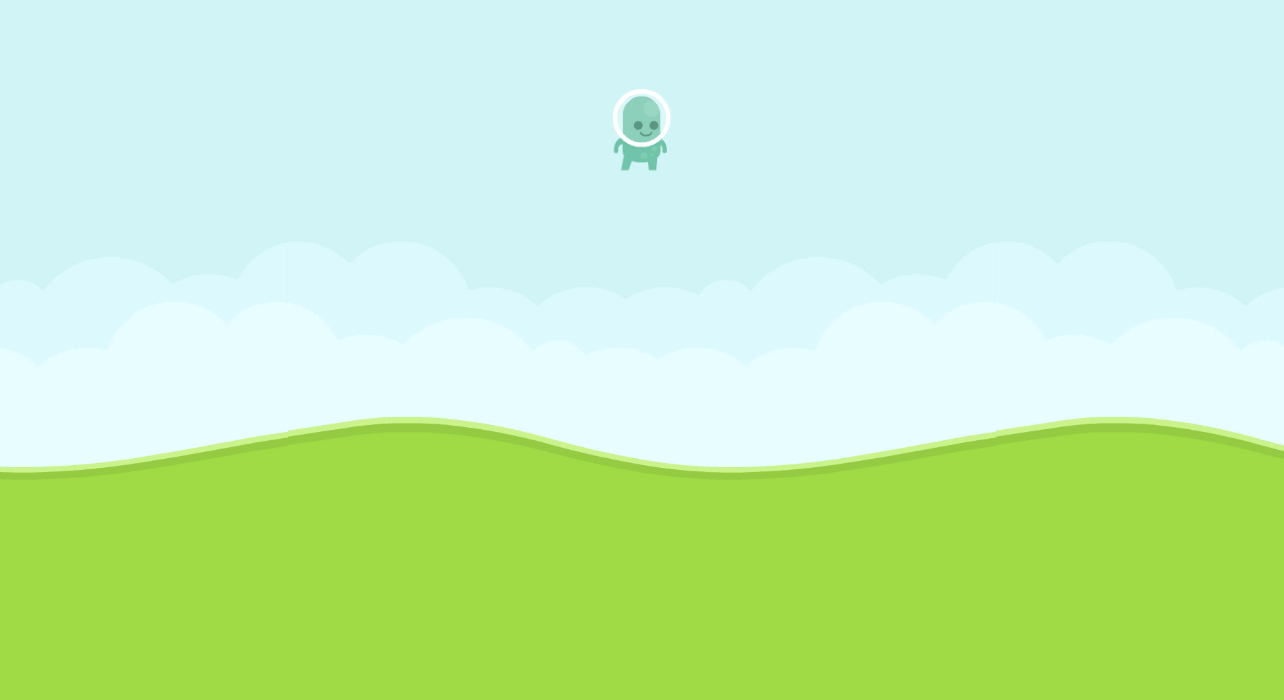
At this point, you should be able to see the player character fall off the screen since there’s nowhere for them to land. Thankfully, this is easy for us to fix but it will take us a bit of time to get there as we will be covering a few new topics.
Creating a Tilemap
Adding a tilemap to our level is fairly straightforward and only requires us to select which type of tilemap we wish to use.
- Go to the top menu bar and select GameObject
|2D Object|Tilemap|Rectangular.
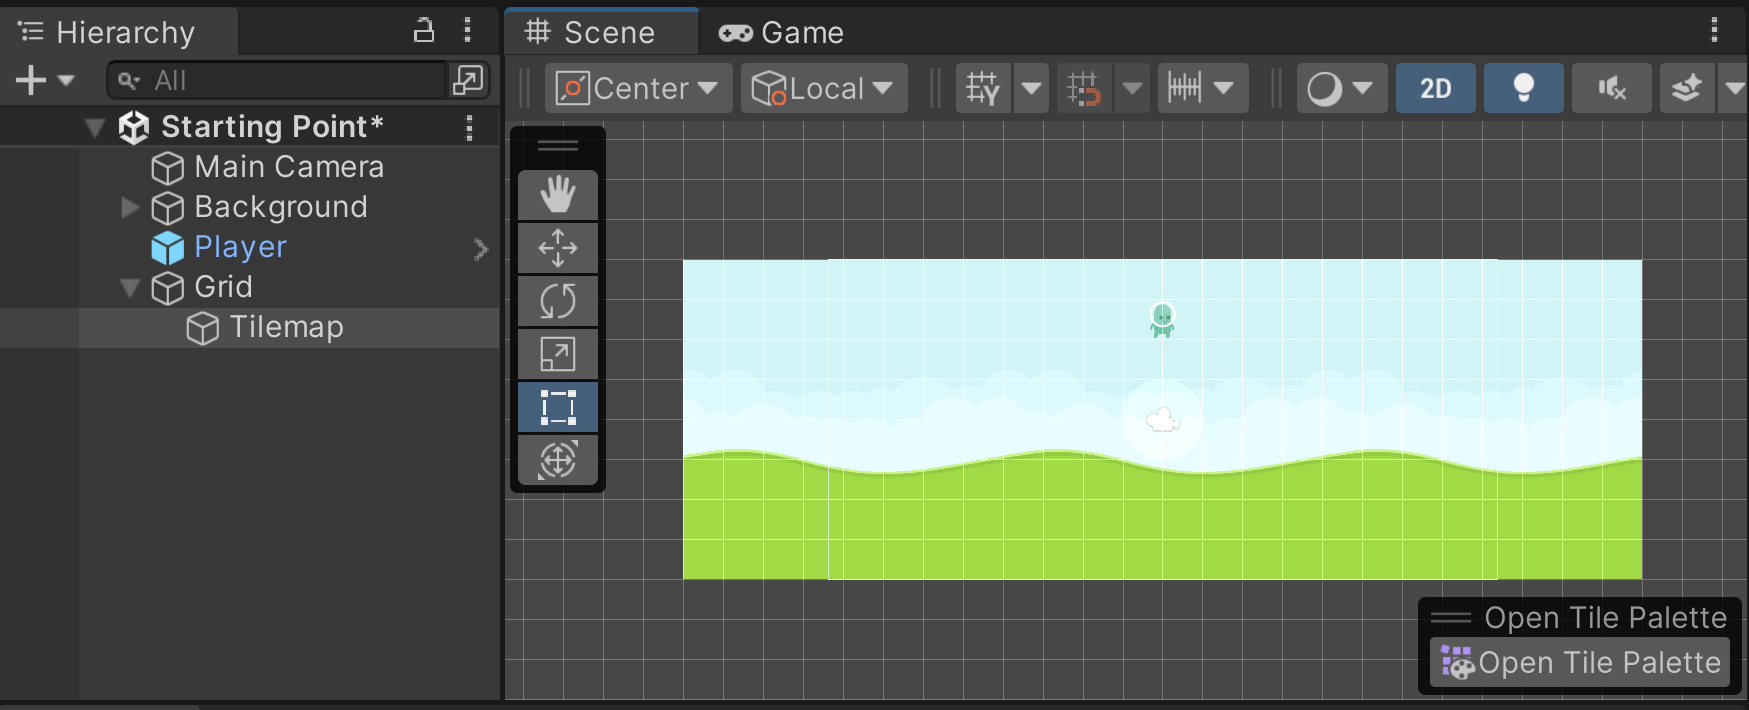
This will create two new game objects, one parented to the other, in the Hierarchy tab:
- Grid – Contains the Grid component which contains information about the size of each cell, the gap (if any) between tiles, and the Cell Swizzle which dictates how the cells will be drawn.
- Tilemap – Contains two new components: the Tilemap and the Tilemap Renderer which allow users to customize how the tilemap will be drawn and how it is oriented.
These two objects allow you to draw tiles onto the screen that exist on a Tile Palette. What’s that? Well, before we get to that, let’s first discuss the things we will need to know to create tiles in general first.
Unit Size
Before we get to adding tiles to the scene, it would be a good idea to have an understanding of some basic concepts concerning how sprites work inside Unity by default.
- Go to the Scene view and notice that there are gray lines crisscrossing the screen creating a grid within our game environment.
Each of these squares has a width and height of 1 Unity unit which is how all objects in the world are positioned. Unity’s 2D physics engine also considers one Unity unit to be equal to 1 meter by default.
You can see this relationship between position and Unity units yourself by doing the following:
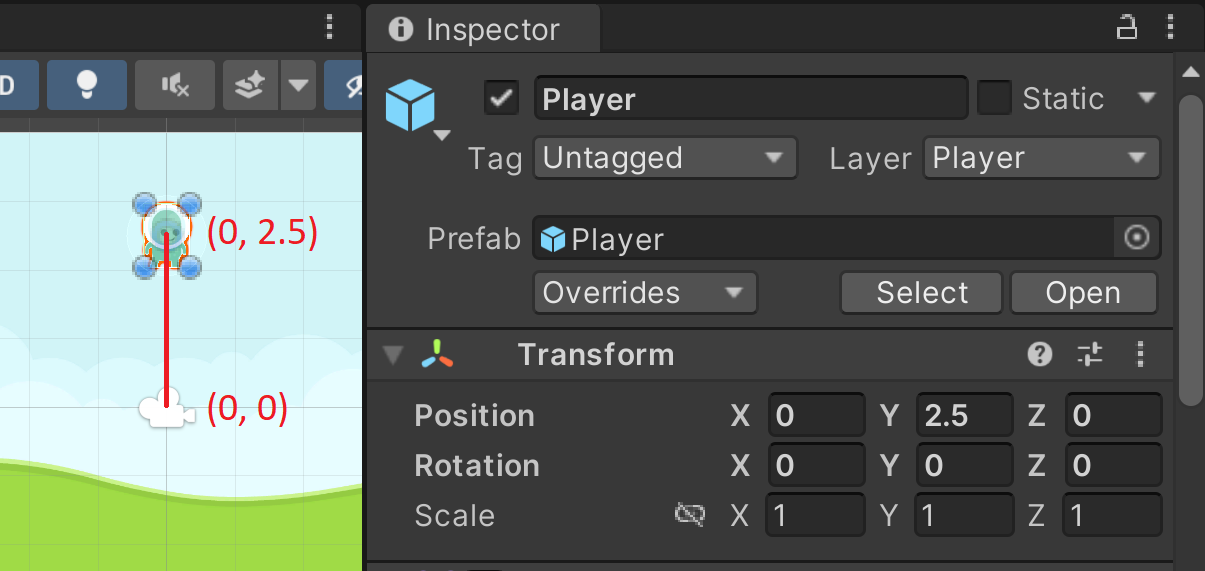
- Select the Player object in our scene or by selecting it in the Hierarchy window:
- From the Inspector window, you can see that the Transform component on the Player object has the Position property set to (0, 2.5, 0). This means that the player is positioned 2.5 units above the center of the world.
Pixels Per Unit
For 2D games, each sprite is scaled based on the number of pixels in the image. By default, Unity considers 100 pixels to be 1 Unity unit in size. With that in mind, if you create sprites that are 100px x 100px in size they will fit within the grid. However, this is not something that is guaranteed. To see the size of our image, you will need to go to the Project window and then open the Sprites\Tiles folder. Upon selecting one of the images, you should notice the Inspector window will display the sprite’s properties:
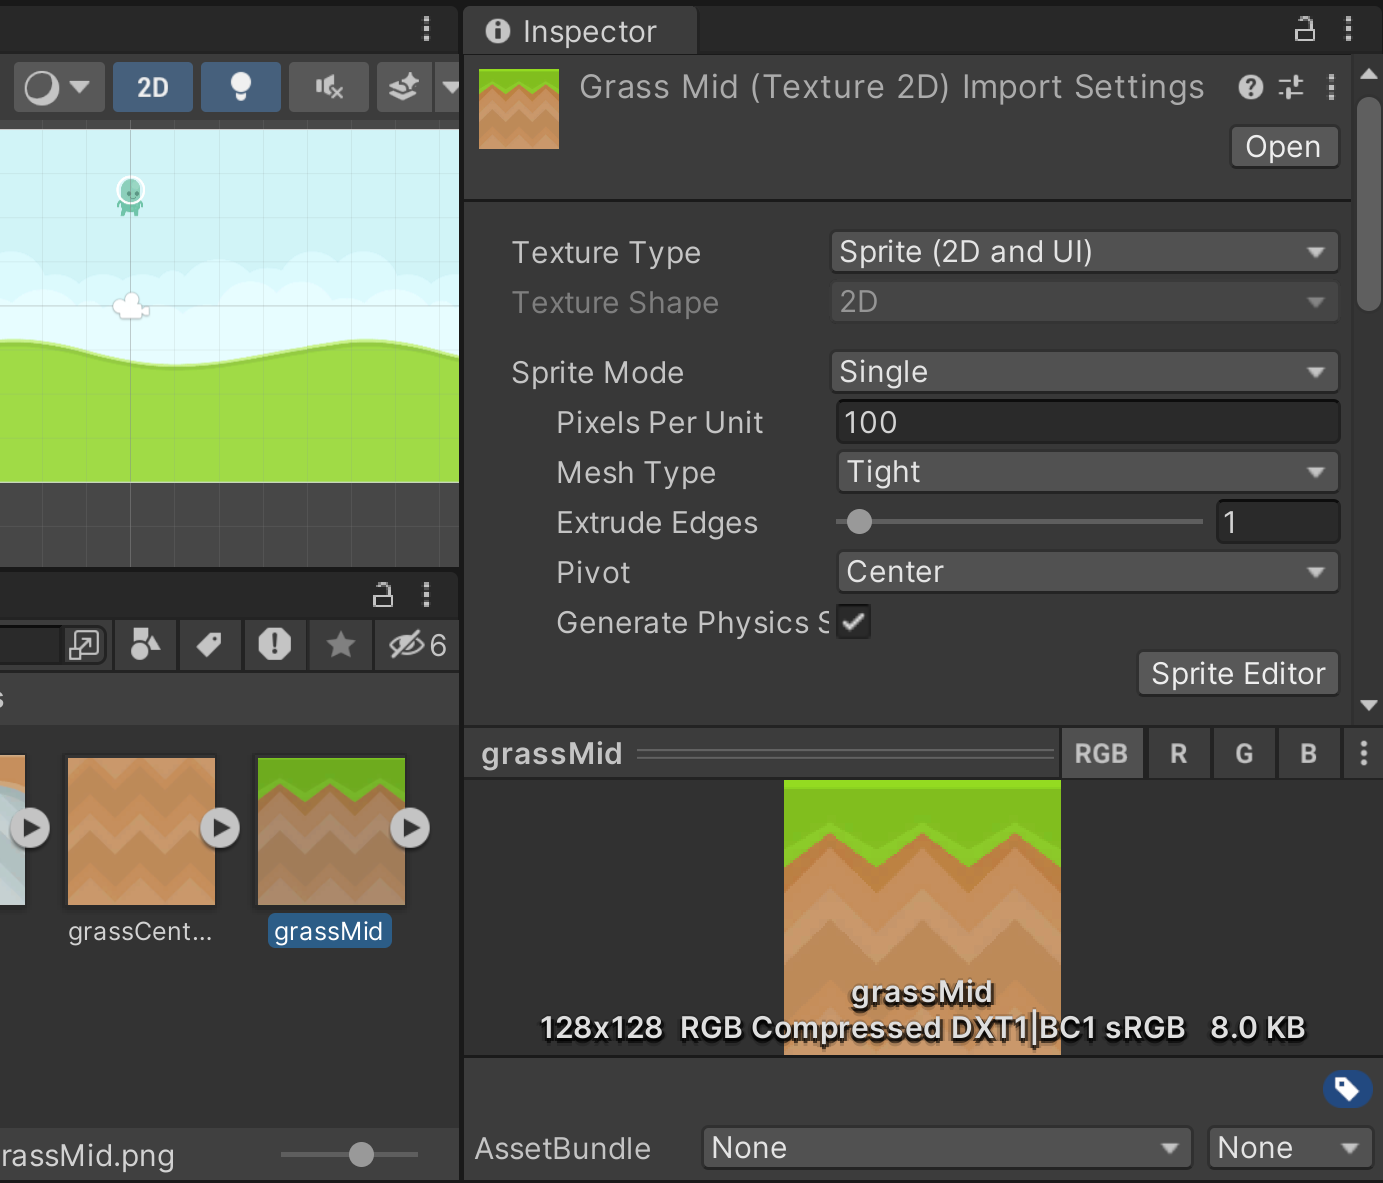
At the bottom of the tab, you will see information on the actual size of the image that Unity is using. In this case, the tile is 128 ×128 pixels in size.
Also, notice the Pixels Per Unit property. As mentioned above, this is what tells Unity how large you want this image to be scaled when brought into the game.
- Try creating an object for this sprite now by dragging it from the Project tab and dropping it in the Scene tab. You should notice that it looks something like this:
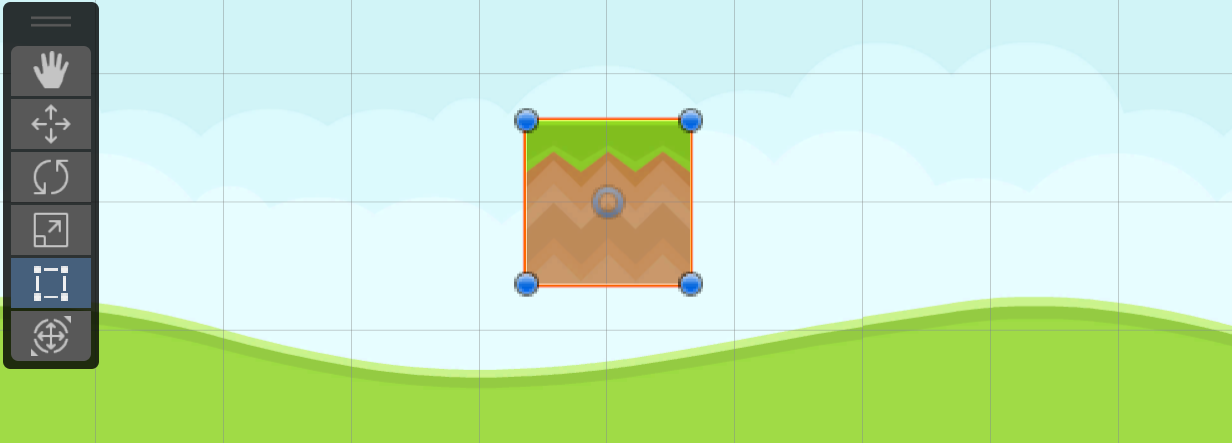
Notice that the size of the tile is larger than 1 unit. Since you now know that the image is 128 x 128 pixels in size and that the Pixels Per Unit property on this object is 100, it can be inferred that the tile is exactly 1.28 Unity units wide and long.
This can easily change this scale by modifying the Pixels Per Unit property. To do that:
- Select the tile again in the Project window. In the Inspector window change the Pixels Per Unit to 128 and then select the Apply button.
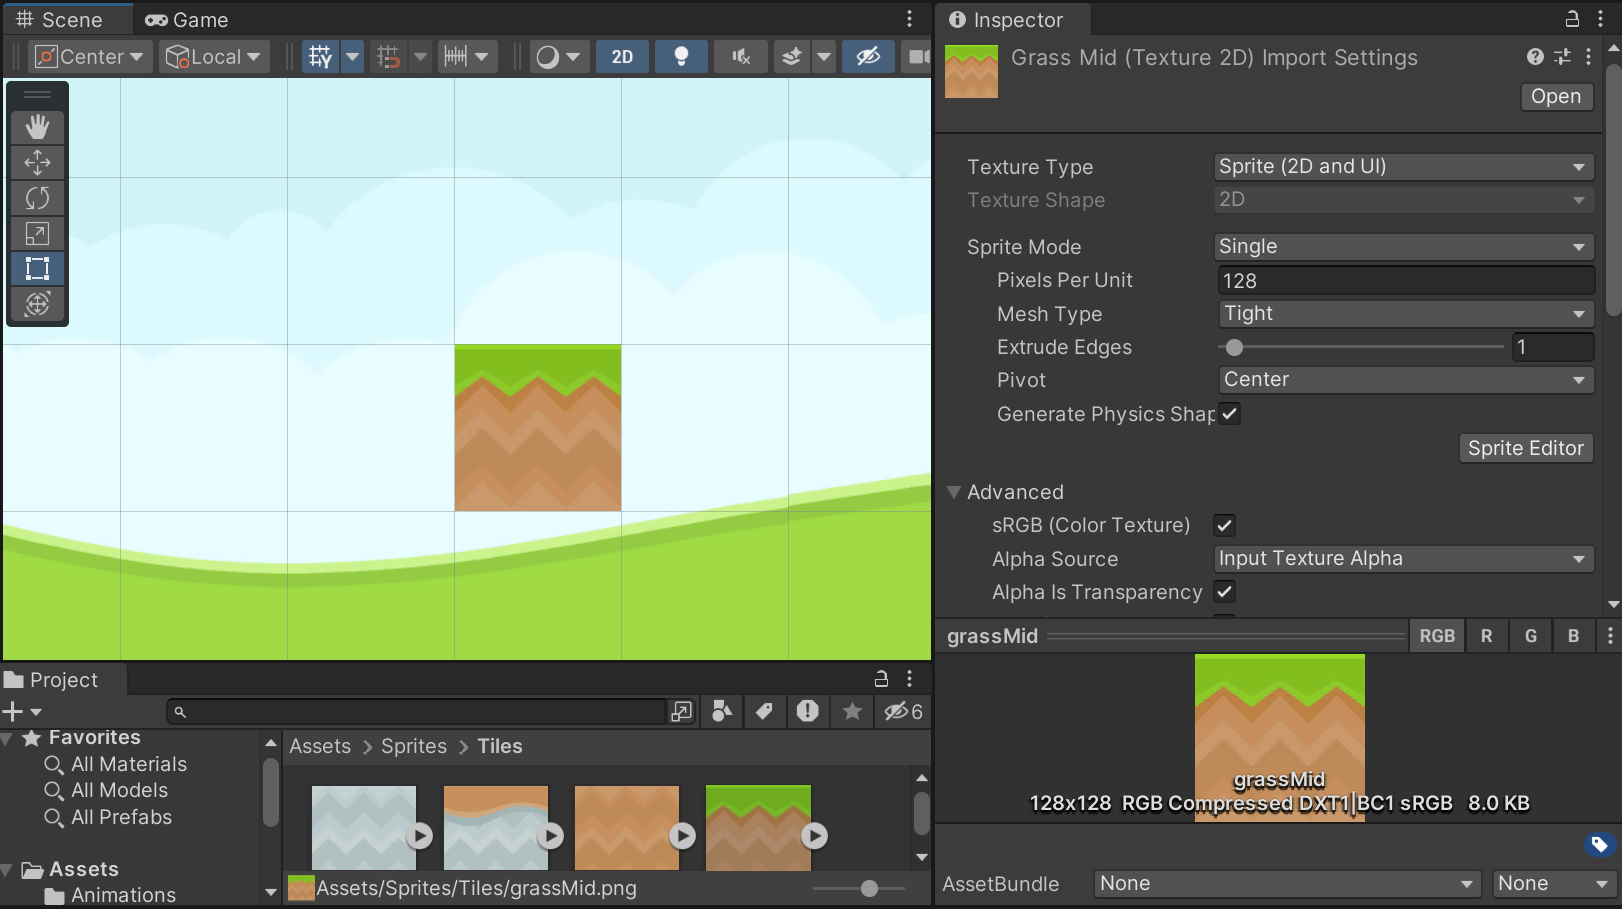
You will now notice that the size of the tile in the Scene view has scaled down and is now matching the size of the grid perfectly.
- The example tile is no longer needed, so delete the example tile object from the scene that you made (select it and then press the Delete key) and then select all of the other tile objects from the Project tab in the Sprites\Tiles folder
- Once they are all selected, change the Pixels Per Unit property to 128 and hit the Apply button.
Now that all of our tiles will fit into the grid cleanly, we are now ready to learn about how to use the Tile Palette window.
Using the Tile Palette
Much like a traditional palette allows painters to arrange and mix paints, Unity’s Tile Palette window allows you to place tiles there to hold before using them on the tilemap itself.
-
To open up the Tile Palette window in your project, go into the top menu bar and select **Window 2D Tile Palette** (or if the Tilemap is selected click on the Open Tile Palette button from the Scene view).
This will open the Tile Palette as a floating window that you can move anywhere you want by clicking and dragging the tab with its name. I will drag and drop it on top of the Inspector tab so it will replace that space as you can see below:
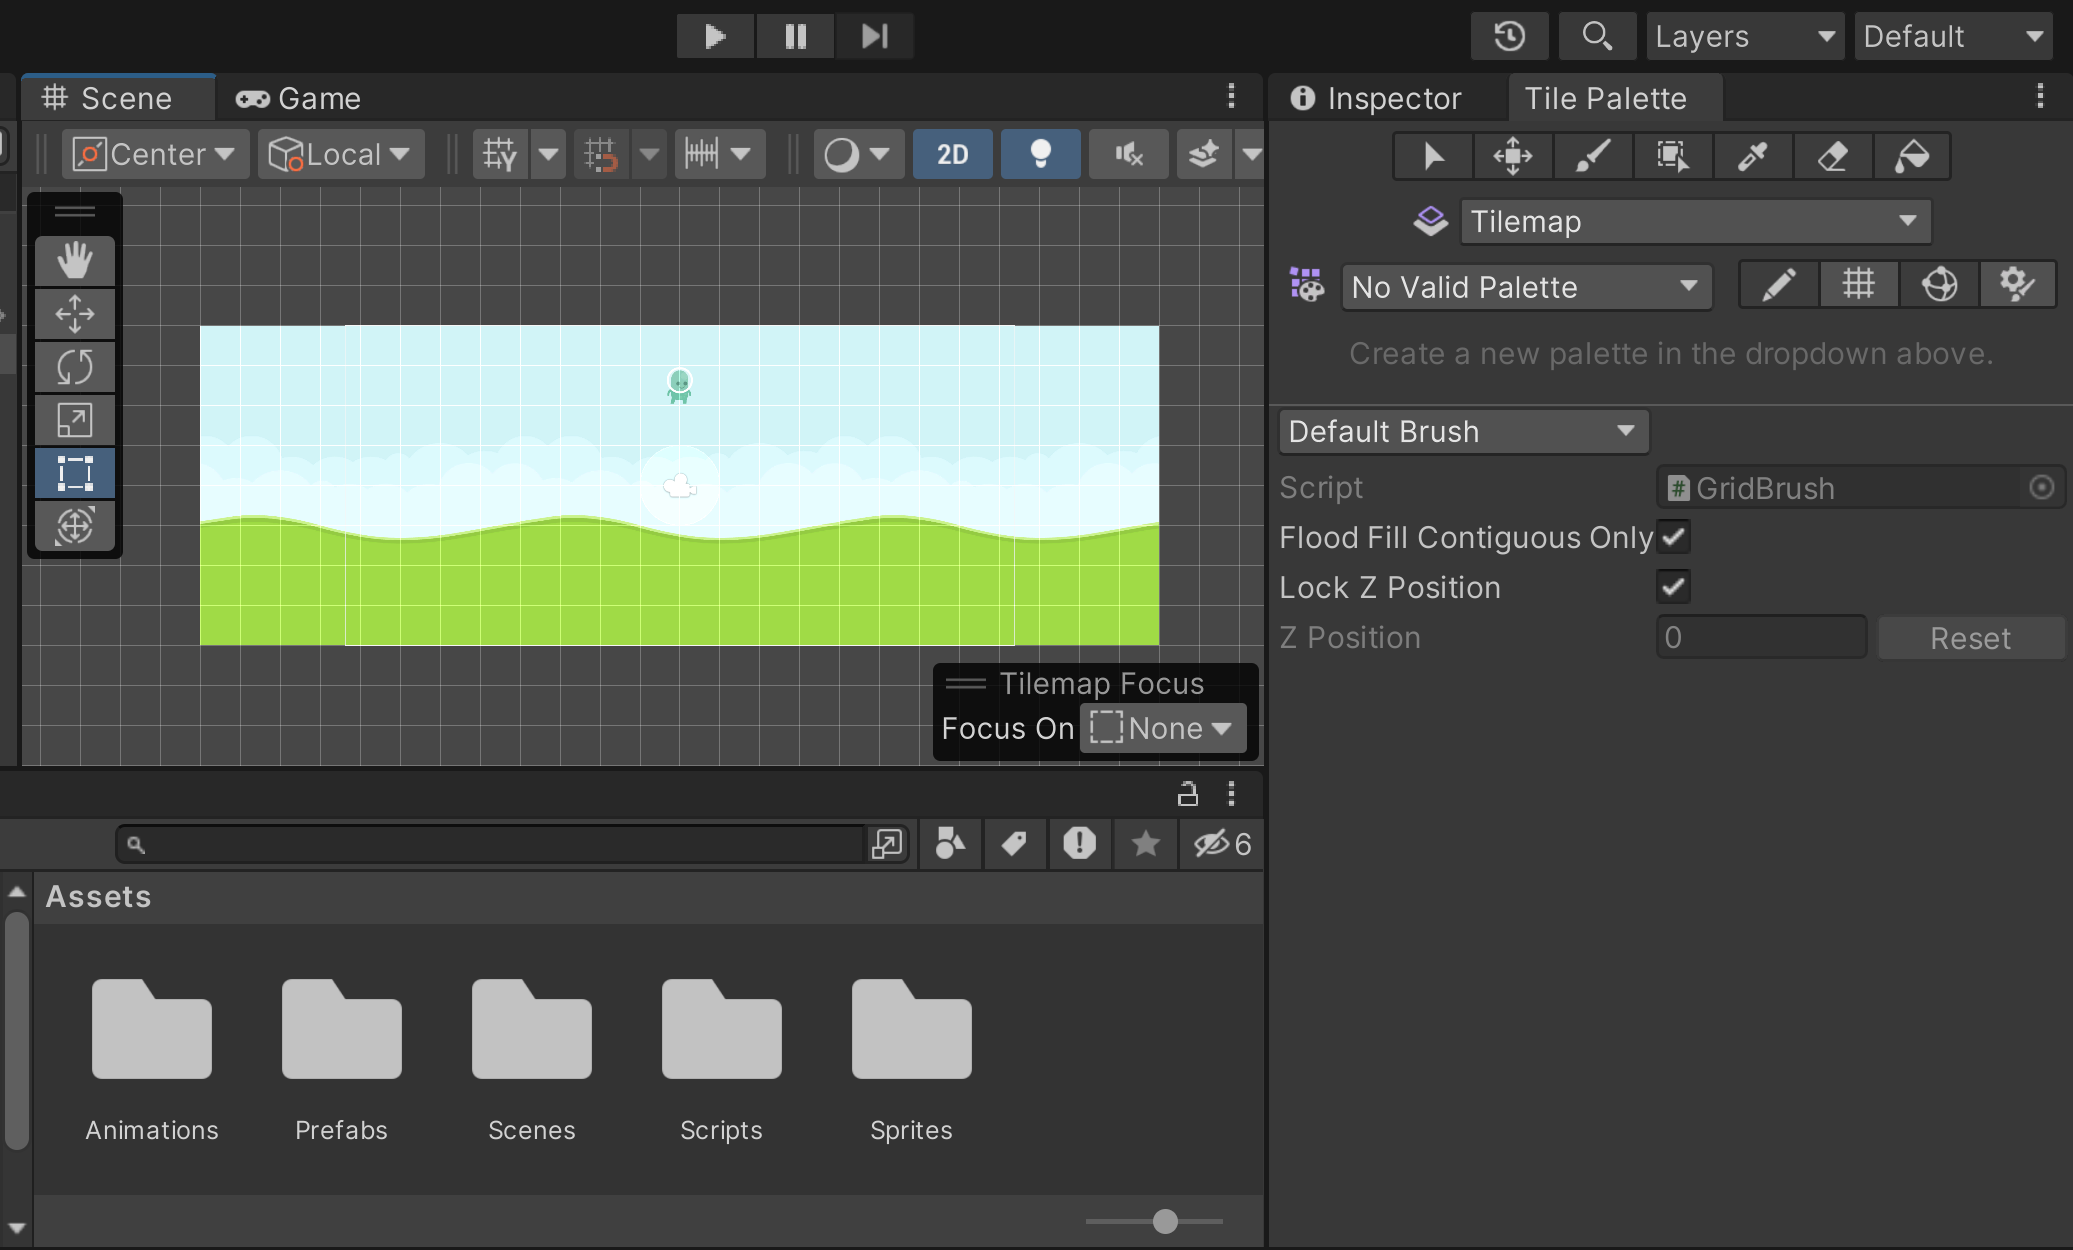
Before you can start drawing tiles you first have to create a palette to hold the tiles.
- To do this from the Tile Palette window select the No Valid Palette dropdown menu and then select the Create New Palette option. This will display the Create New Palette pop-up for you to select the type of palette you want:
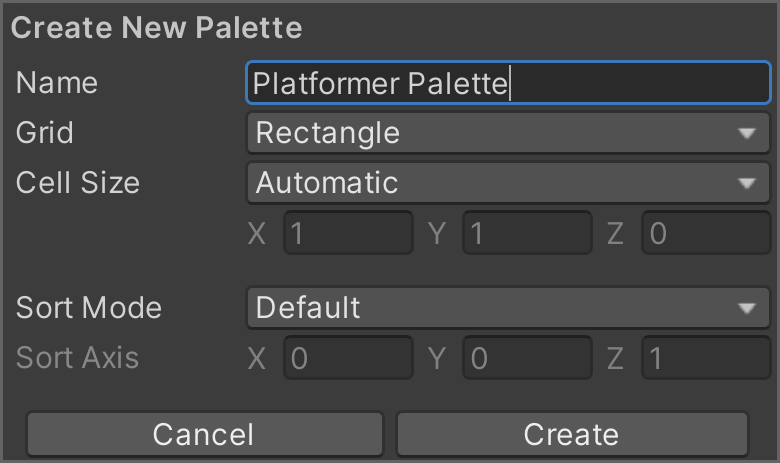
- Under Name enter Platformer Palette and then select the Create button.
- You’ll be asked what folder you’d like to save the palette in. Go ahead and create a new folder in the Assets folder called Palettes and save it there.
Now that you have a palette to put tiles on, you now need to add a tile to the palette to draw. Thankfully, it’s very easy to create basic tiles:
From the Project window, go into the Assets/Sprites/Tiles folder and drag and drop a sprite into the space on the Tile Palette. Once you let go it will ask you to select where you want the tile to be saved. Create a new folder in the Assets folder called Tiles and save it there.
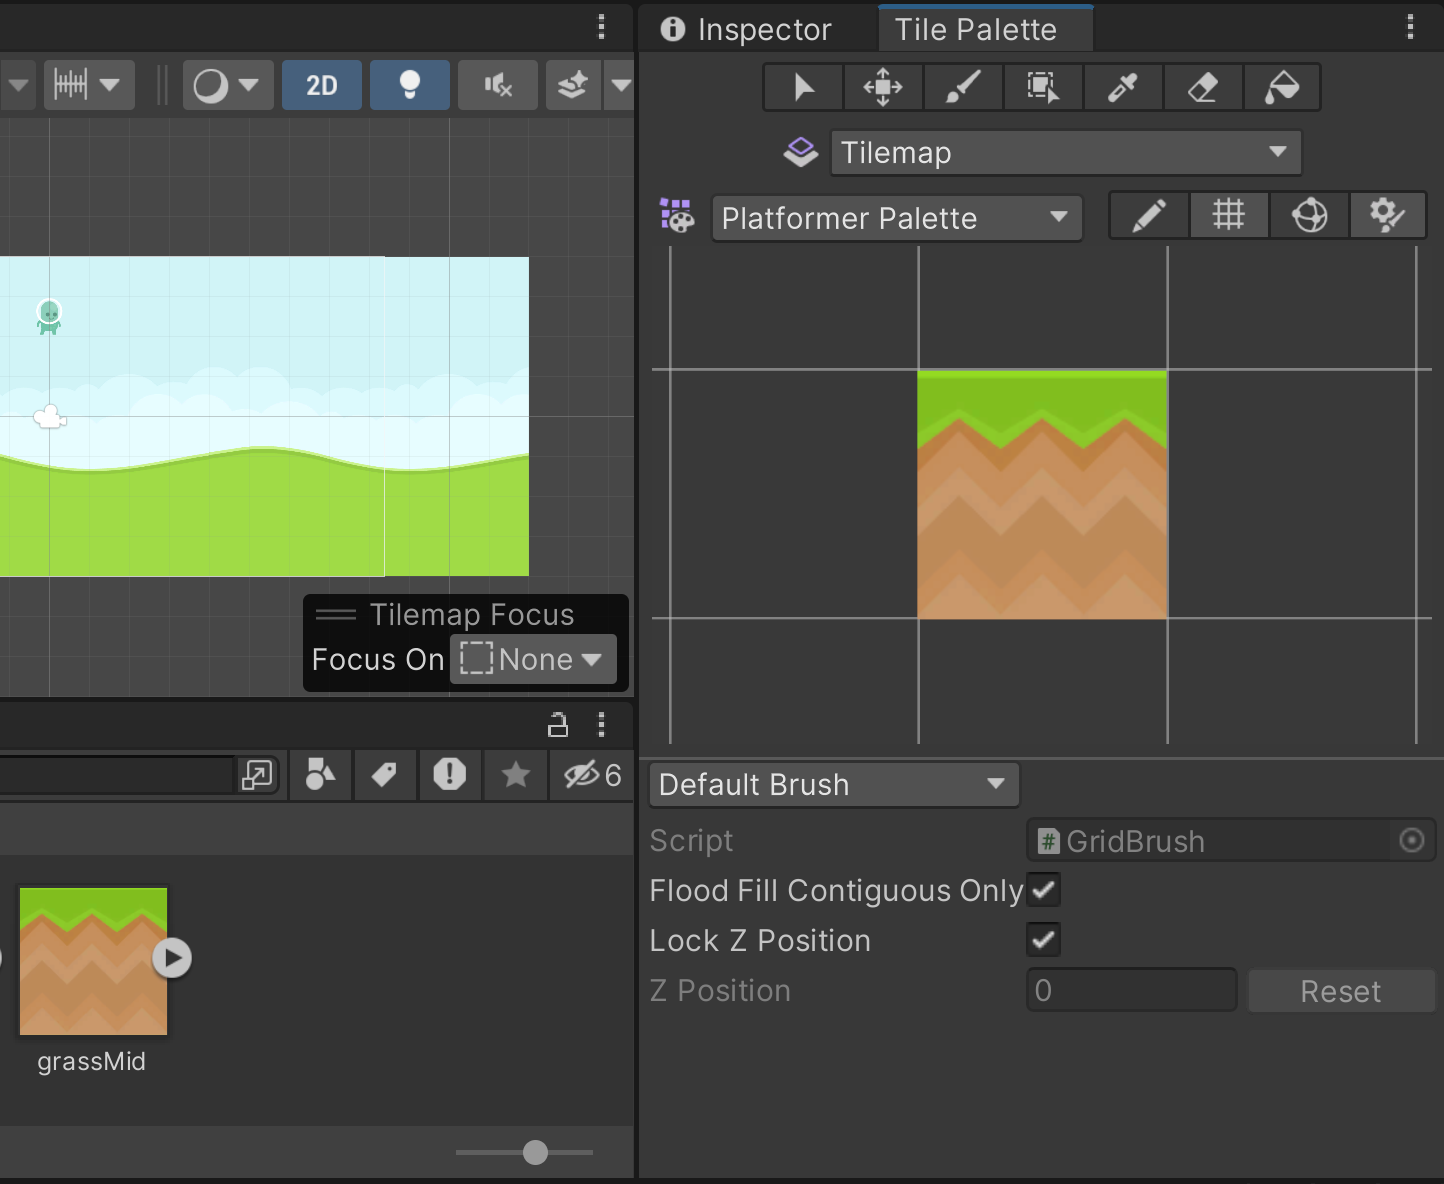
After this, you should see the new tile inside the Tile Palette!
Tile Palette Controls
Right now, the displayed palette seems quite large. This can be adjusted by moving the mouse over the Palette and then using the mouse wheel to zoom in and out. The middle mouse button will allow you to pan the camera, and you can select whatever tile you’d like to use via left-clicking.
Now that we have a Tile Palette and a Tilemap we now can start drawing content on our map!
Drawing tiles onto the Tilemap
The tile palette has several ways that one can draw tiles on the screen:

- Select Tool – Selects an area of the grid
- Move Tool – Move selection to another place
- Paint Tool – Paints with the active brush
- Rectangle Tool – Paint a rectangle with the active brush
- Picker Tool – Pick tiles from the tilemap to paint with
- Erase Tool – Will remove tiles from the tilemap
- Fill Tool – Will paint the entire area
Using the Paint Tool
The most intuitive tool to use is probably the paint tool because it allows us to place tiles easily onto our scene.
- From the Tile Palette click on the tile you placed. You should see that the Paint Tool with automatically get turned on by default (the button with the paintbrush on it).
- Once selected, move the mouse over to the Scene tab and draw a platform underneath the player by left-clicking and dragging to place tiles.
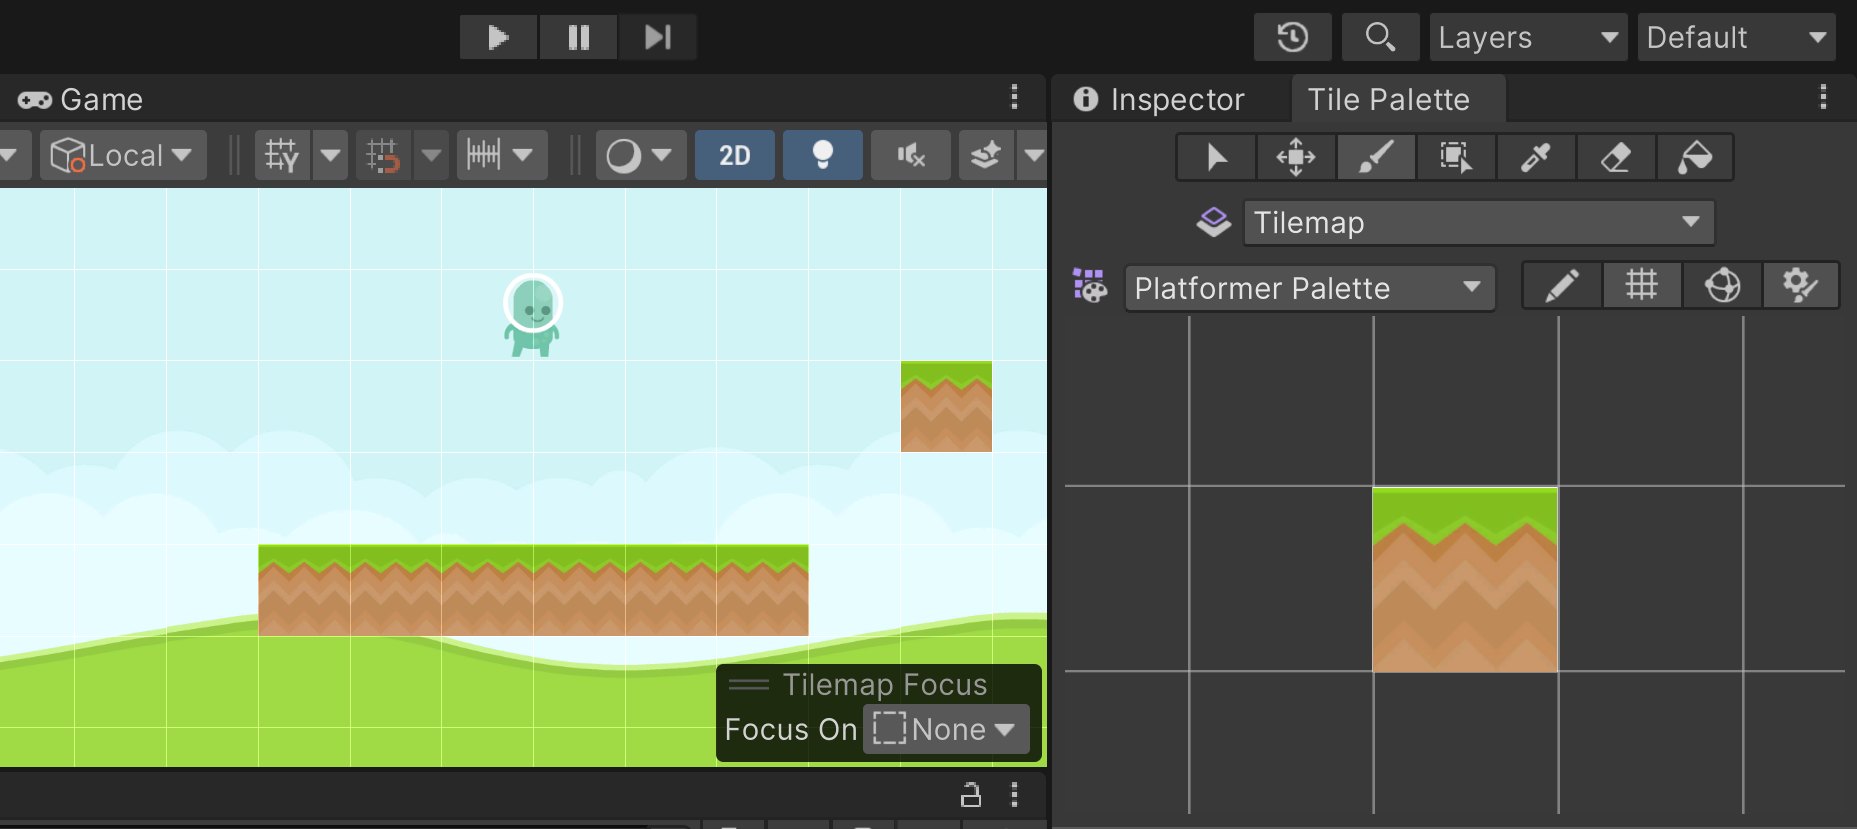
After all that setup, we finally have tiles on the screen!
If your tiles are not matching the size of the grid, you may either modify the Grid component’s Tile Size property or you may modify the Pixels Per Unit property mentioned earlier in the Unit Size section above.
Erasing Tiles
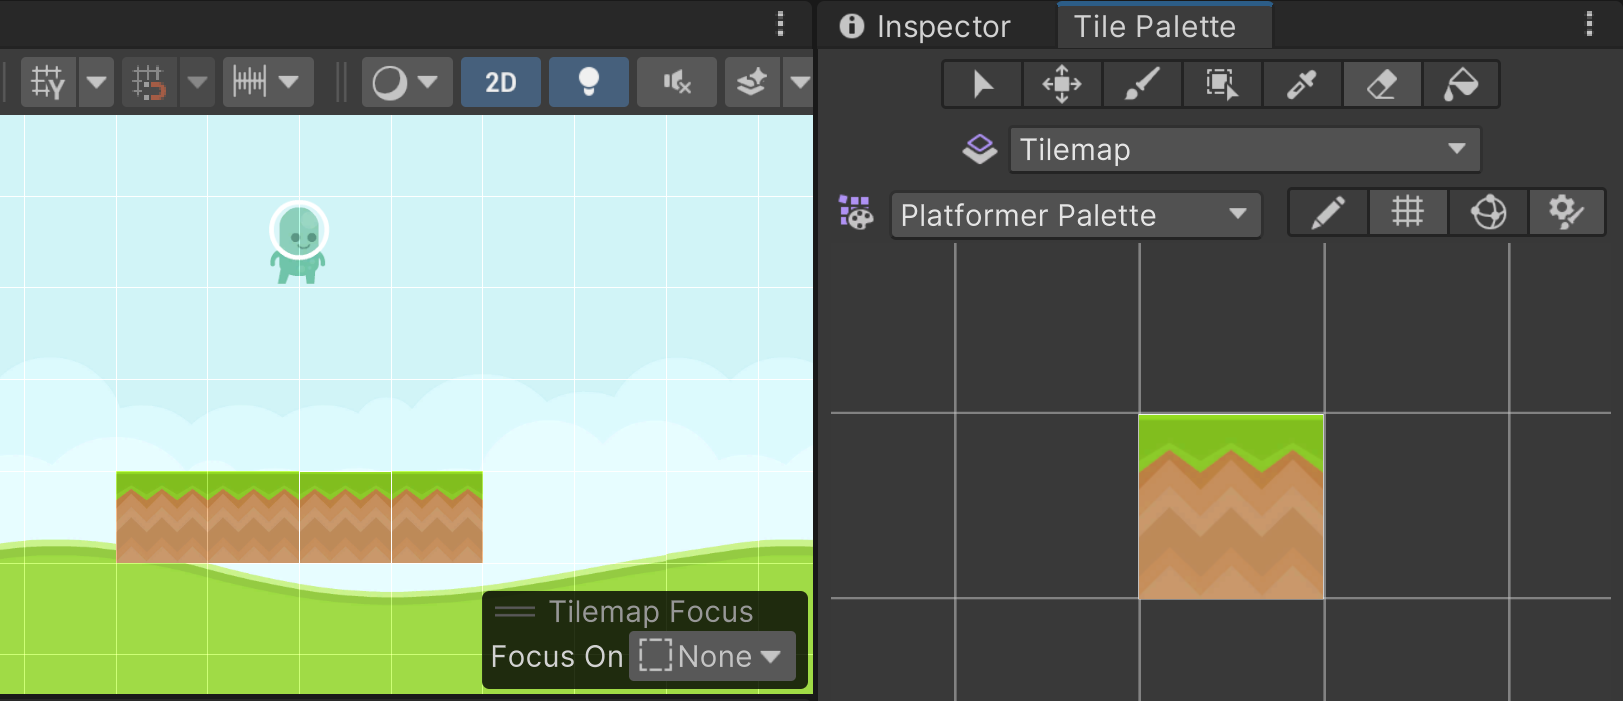
There’s always the possibility of making mistakes. To remove those, you can make use of the Tile Palette’s Erase Tool.
- To use the Erase Tool, you can either select the eraser icon from the top of the Tile Palette or you can hold down the Shift button and then click wherever you’d like to remove a tile.
Using the Rectangle Tool
As great as drawing everything by hand is, it would be a lot quicker to draw boxes instead of placing each tile individually.
- For this example, add the other dirt tile to the Tile Palette for placement by dragging and dropping the grassCenter sprite from the Project tab in the Assets\Sprites\Tiles folder into the Tile Palette beside the original tile. Just like the first tile, Unity will ask you where to save the new tile, and again place it in the Assets\Tiles folder.
Afterward, click on your new tile in the palette and then select the rectangle tool. Once selected, then start dragging and dropping below your platforms to fill in the spots below your platforms.
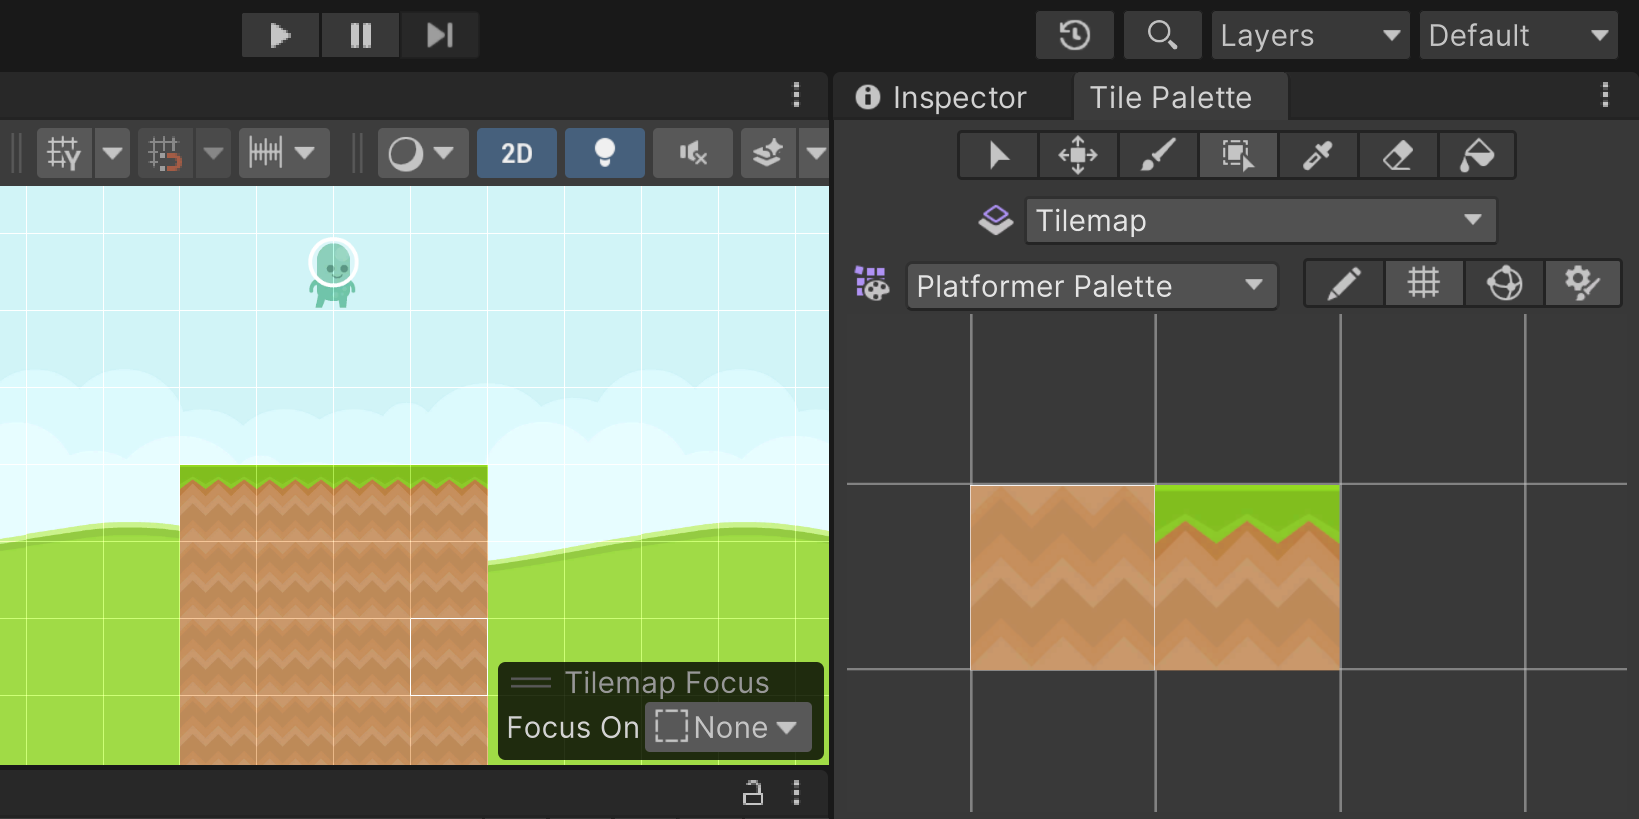
As you can see, it’s a lot quicker to create boxes using this tool than clicking and dragging each tile by hand! Placing boxes like this is useful for blocking out an area quickly for testing (sometimes referred to as greyboxing in level design circles).
Once you’ve playtested the level you can go in later and then add additional details and polish the level up.
Duplicating platforms using the Picker Tool
Often, you will want to replicate content you’ve made previously so you can reuse and tweak it later. The picker tool allows you to do that.
- From the Tile Palette select the Picker Tool and click and drag from the top left to a lower section of one of the platforms created.
- When you release the mouse button you should notice a duplicate of your selection following your mouse. If you click on the mouse, you should see the duplicate placed there. Use this to create another platform.
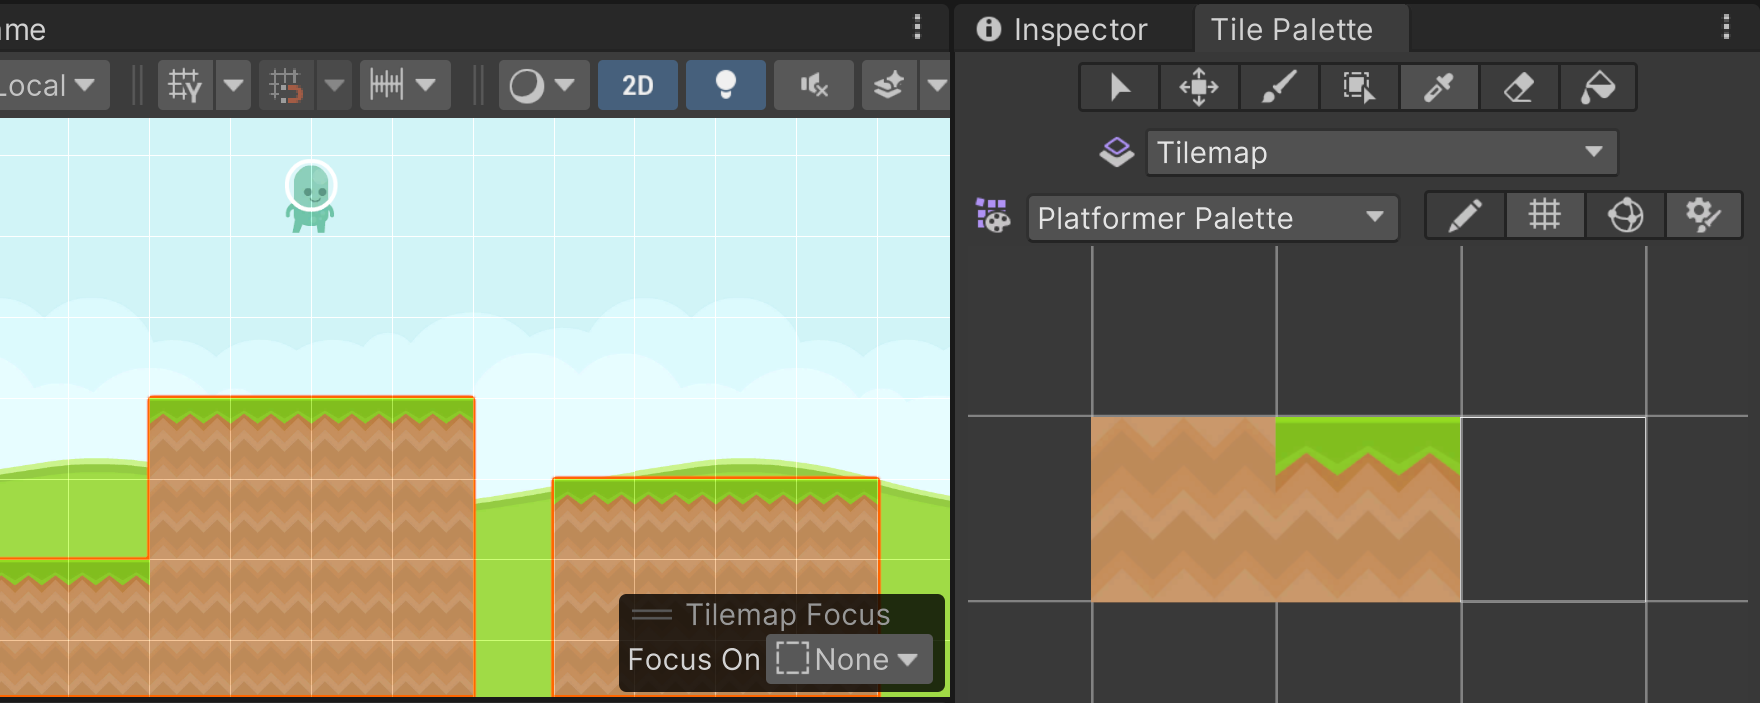
Tweaking items using Select and Move
Platformer games often require a lot of tweaking to create levels that feel and play well, such as making a platform 1 unit lower than before or adding or removing spaces between jumps. The Select and Move Tools allow you to do this easily.
- Select the Select Tool (mouse button icon) and drag and drop a set of tiles. You may be taken to the Grid Selection menu. This will allow you to modify the selection in several ways but off the grid. To stay on the grid we will use the Move Tool.
For more info on the Grid Selection tool and the ability to add/remove elements from the tilemap check out: https://docs.unity.cn/Manual/TilemapPainting-SelectionTool.html
- Switch back to the Tile Palette and then click on the Move Tool (arrow icon) and then click and drag to shift the tiles around.
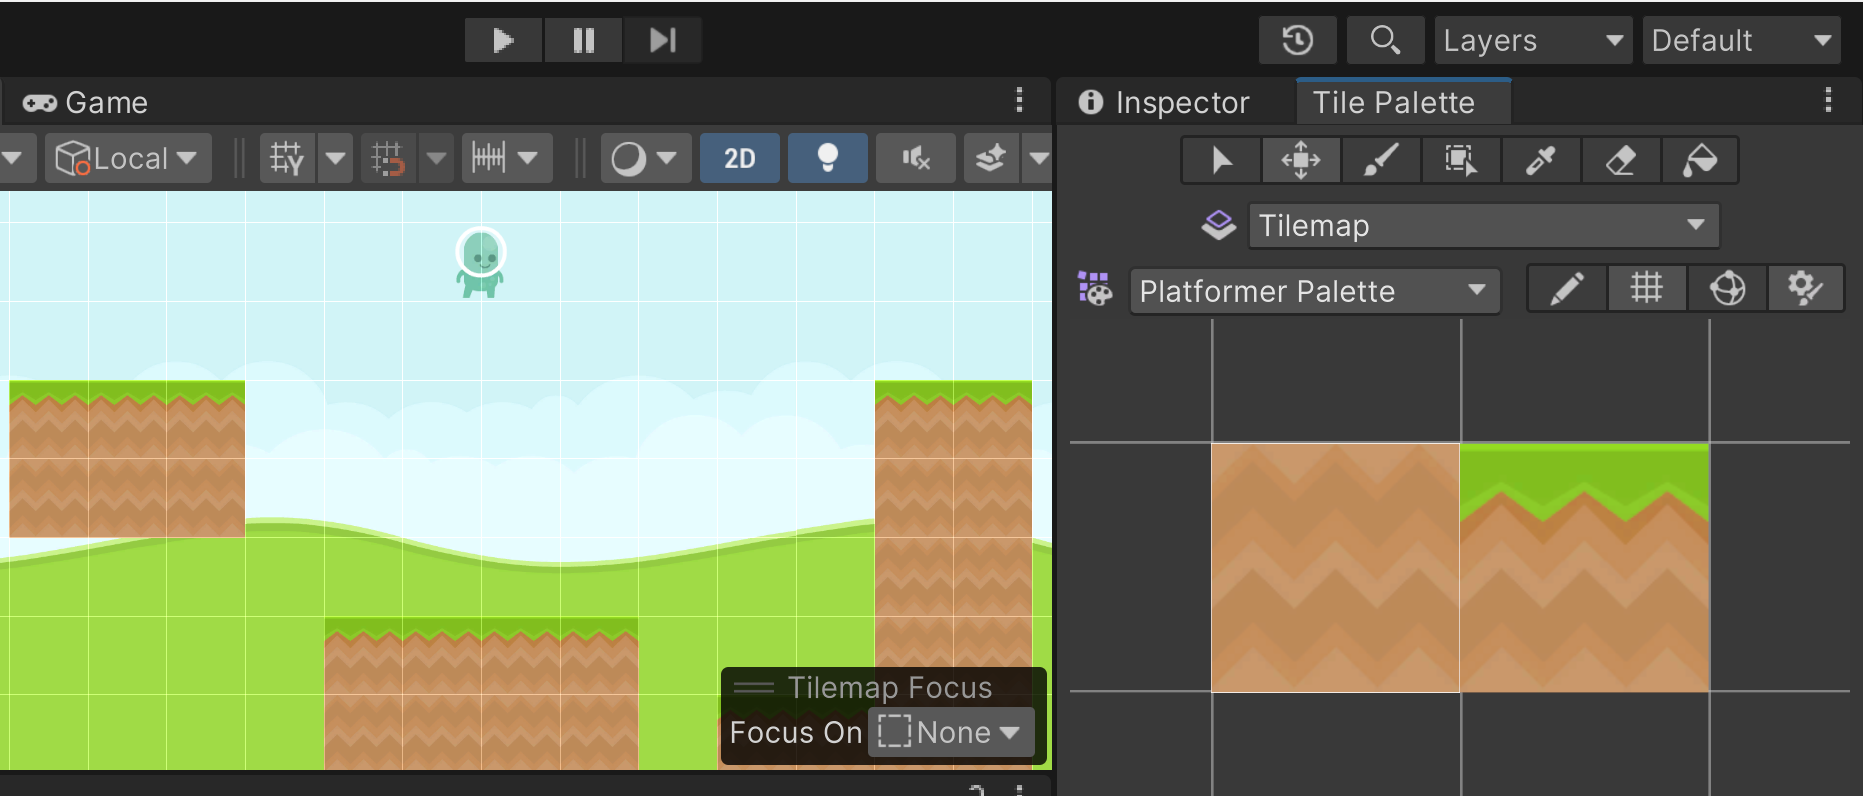
As great as your map currently looks, when you play the game, the player will still fall through the level. That’s what we will be fixing next.
Tilemap Collision
To make the tilemaps interact with the player we can make use of a special collider created for tilemaps, the Tilemap Collider 2D component.
- From the Hierarchy window select the Tilemap GameObject.
-
With it selected add a Tilemap Collider 2D component to the object by going to the top toolbar and selecting **Component Tilemap Tilemap Collider 2D**.
After that you should notice green boxes on all the tiles of our tilemap:
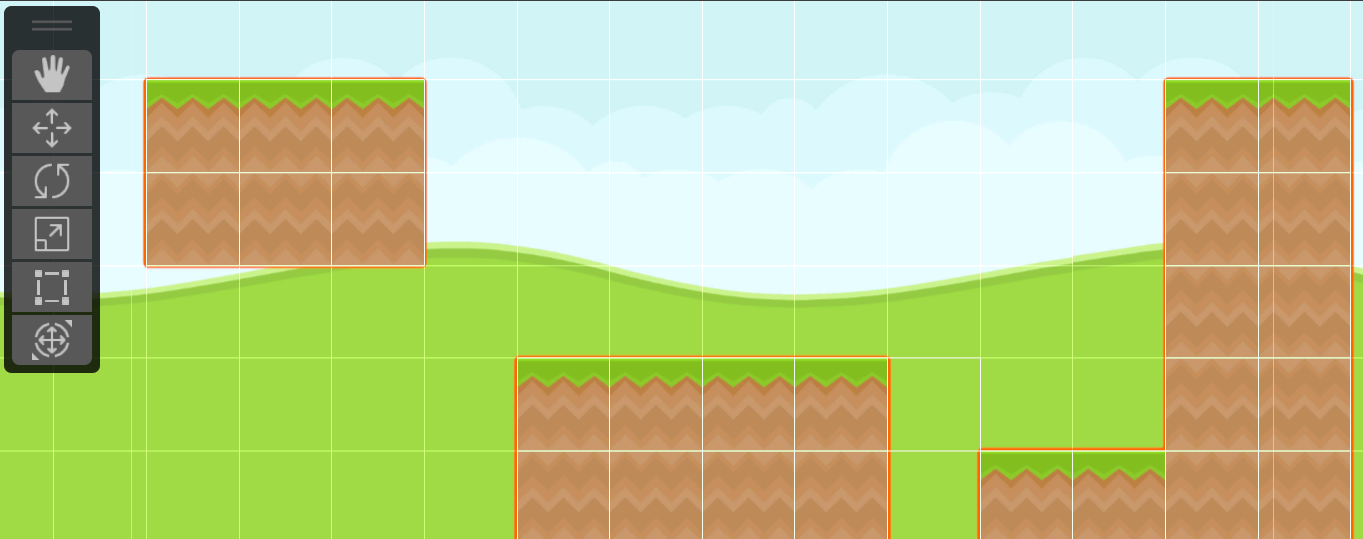
Just like when we add colliders on traditional Game Objects, these boxes represent the collision data that the physics engine uses to determine if two objects are colliding. If you select the Player, you can notice that it already has a Capsule Collider 2D component attached which also shows a green box when selected in the Scene tab. When two objects with 2D colliders hit each other and at least one of them has a Rigidbody 2D component attached with a Body Type set to Dynamic (which the Player does) the object with the Rigidbody will react to collision events.
If all goes well, at this point if you play the game you should notice your player will now be able to land and walk on the tiles correctly!
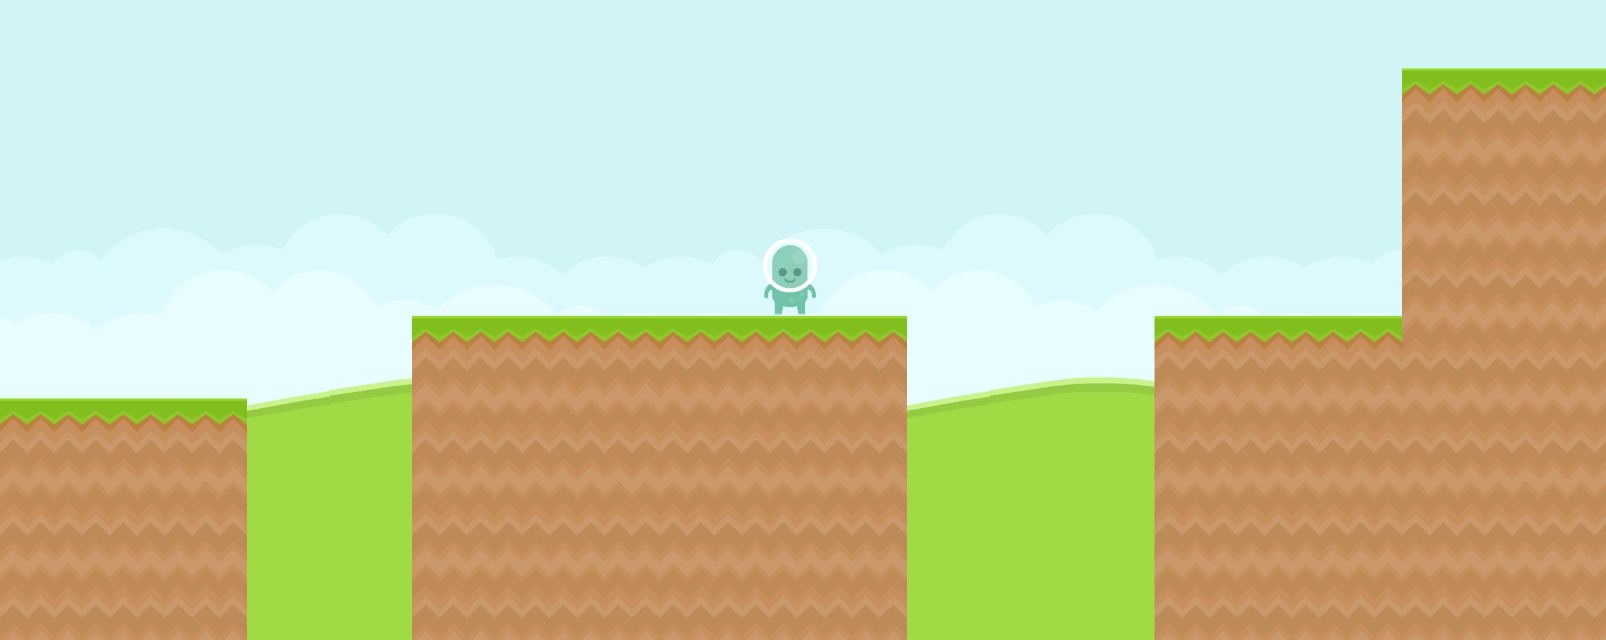
Once we have a Tilemap Collider 2D component attached to a tilemap, all of the tiles will cause the player to collide with it.
Because our object uses a capsule collider it’s only going to collide at one point with the ground. Using a more complicated collider like a Box Collider 2D could cause an object to get stuck upon colliding with multiple tiles at once.
- To fix this issue, you can go to the Tilemap Collider 2D component and check the Used by Composite option.
-
Afterward, add a Composite Collider 2D component to the object ( **Component Physics 2D Composite Collider 2D** ). Note this will also add a Rigidbody2D to the Tilemap as well so if you play the game the tilemap will fall due to gravity. - To fix this, select the Tilemap object and in the Inspector window goes to the Rigidbody 2D component and set the Body Type to Static.
Adding foliage to 2D tilemaps
Having collisions is great, but what if you wanted to have tiles that did not have collisions, such as some props? The simplest solution would be to create a second tilemap to put all of the things we do not want to collide with. This can work well, but if we put tiles at the same position on both tilemaps, by default we will not know which one will be drawn on top of the other one. To solve this, we can use the properties of the Tilemap Renderer component to customize how things will be drawn.
-
Create a new tilemap by selecting the Grid object in the Hierarchy window and then selecting **GameObject 2D Object Tilemap Rectangular** from the top menu. - Select the new tilemap that was just created and give it a new name of Upper Layer by going to the top of the Inspector tab, selecting the name, and modifying it. Once you finish naming the object press the Enter key to confirm the change.

Now we have two tilemaps, but it is currently undefined which tilemap would display on top of the other if there was a tile on both. It’s always a good idea to resolve that ambiguity if possible.
- Scroll down to the Tilemap Renderer component and set the Order in Layer property to 1.
By default, this property is set to 0 so by putting a 1 here we are saying that this tilemap should be drawn on top of the previous one. By default, everything has an Order In Layer of 0 so that’s telling Unity that we don’t care what order things are drawn in. In the starter project, you may have noticed that the Background objects already have an Order in Layer of -1 in the Sprite Renderer component to ensure that the other objects will be drawn on top.
For those of you already familiar with working in 2D, Sorting Layers would work for this as well.
Adding Props
Now that you have a new layer, it is time to add some visual flair to the level.
- Open the Tile Palette window and note the Active Tilemap property in the top center. This will show what the current tilemap you are going to be drawing on is. We want to draw on the new tilemap so under the Active Tilemap dropdown select Upper Layer.

Now any modifications that we make to the tilemap in the Scene view will be to Upper Layer, but we currently don’t have our new tiles so that’s what we’ll be adding next.
- Go to the Project tab and open the Assets\Sprites\Props folder. As you can see, we have several new sprites that can be used as tiles to add more visual variation to the level to make things less boring and improve the look of your level.
- Select all the files in the folder at once by first clicking on the spring sprite. Afterward, hold down the Shift key and then select the bridgeA sprite. From there drag and drop all the sprites onto the Tile Palette. While doing this, make sure that you do not drop your tiles on top of the tiles that are already there.
- Once you release the mouse, you’ll be asked to select a folder to place all the tiles. Select the Assets\Tiles folder and select the Select Folder option.
If all went well, you should see the Tile Palette fill up with all of the new tiles in one quick step!
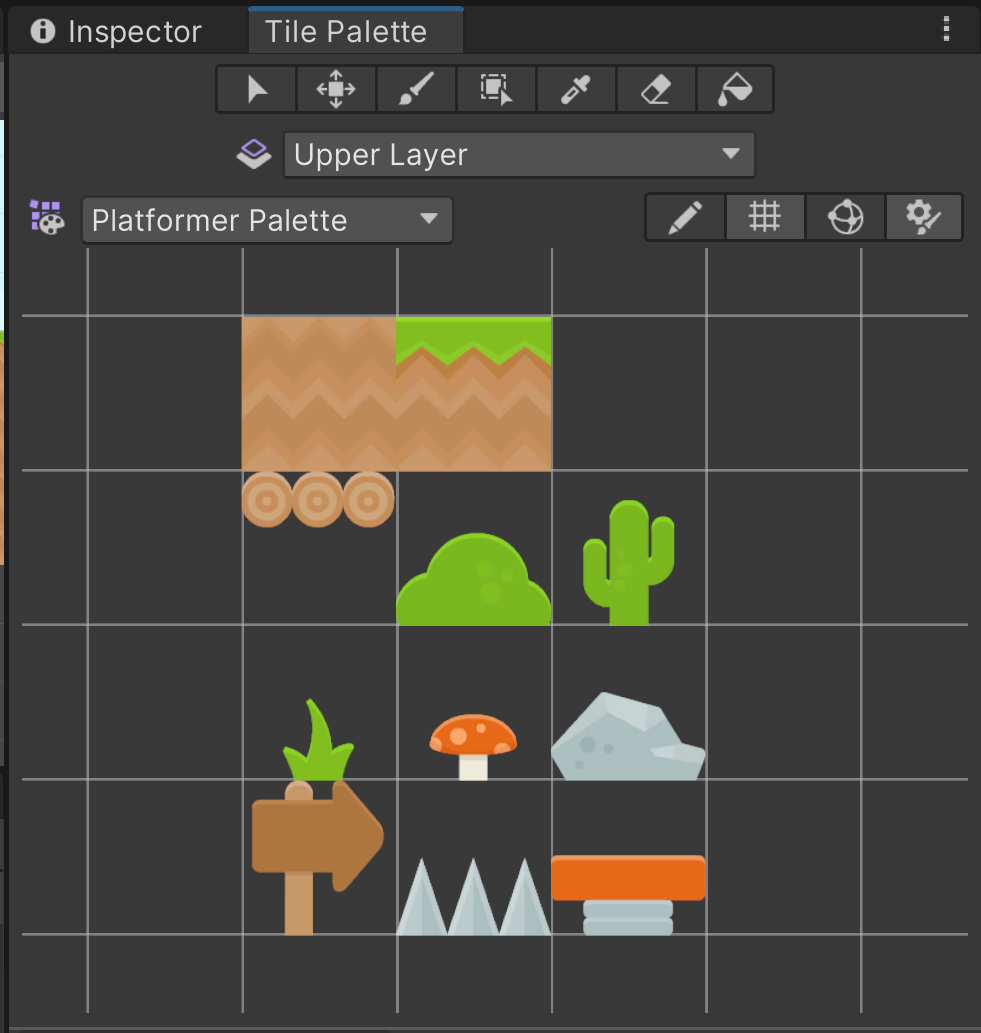
Be sure to save your project after modifying the Tile Palette or you might lose any changes made.
- Once you have all of the props in, add a few of them over your level:
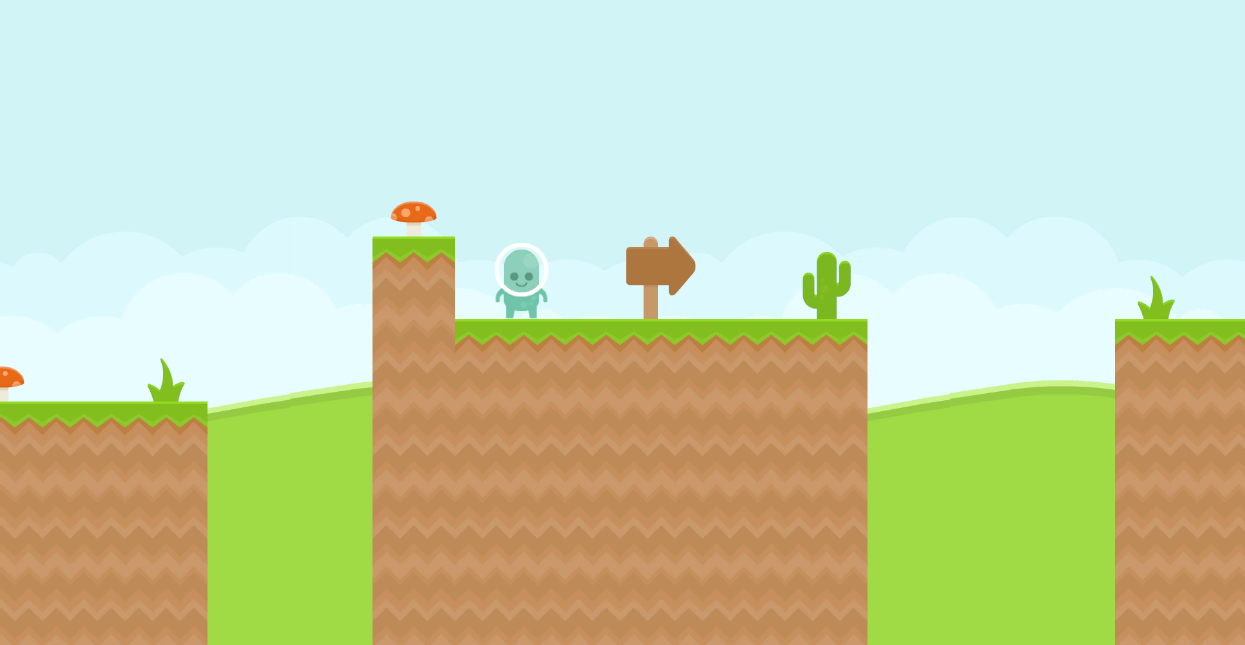
After this, not only does the level look much better, but if you play the game now you will see that your player can walk through the prop tiles in the Upper Layer while still colliding with the previously created tilemap!
- Continue placing props until you are satisfied. Then change the Active Tilemap back to the original tilemap, I placed some bridge tiles so they would have collision and played the game to see the final result:

If you’d like to download the finished version of the project, you can do so at http://johnpdoran.com/UnityProjects/Tilemap-End.zip
Conclusion
And with that, we’ve seen just how valuable Unity’s Tilemap tool can be in teaching game design students how to quickly create the layout and flow of a game level. By using the tool to create a basic blockout of a level, students can gain insight into how the player will move through the space and how different areas connect.
The Tilemap tool also allows for easy iteration and adjustment of the level design, making it an ideal tool for students to experiment with different layouts and refine their designs before investing time in creating more detailed assets.
Overall, the Tilemap tool is an essential tool for educators teaching game design classes, as it not only helps speed up the development process but also improves the overall quality of the game world. By incorporating the Tilemap tool into their curriculum, educators can help students develop their game design skills and produce better-quality game levels.
Feedback
Feedback from readers is always welcome. Let me know what you think about the tutorial- what you liked and what could be improved in this and future ones. If you would like to give me feedback and/or get support on any of the aspects of the tutorial, please feel free to e-mail me at john@johnpdoran.com and mention the tutorial’s title in the subject of your message.
If you do find an error, please send me an e-mail with the following information:
- Name of the tutorial
- The page the error was found.
- What the error is and/or what you think the correction should be.
Once received, I’ll investigate the issue and correct it if necessary.